When a full backup runs for an AIX or Solaris system that is being protected by the Cristie VA, it will generate a recovery ISO that is specific to the system being backed up. This ISO generated by a backup will be used to perform the system recovery.
To protect an AIX or Solaris system you can follow the How to backup a physical machine guide.
Running a Recovery
This is an example recovery sequence for an incremental backup made for a AIX 7.1 machine. The target is a new LPAR. Recoveries for other platforms are similar in principle.
Booting the ISO and Network Configuration
-
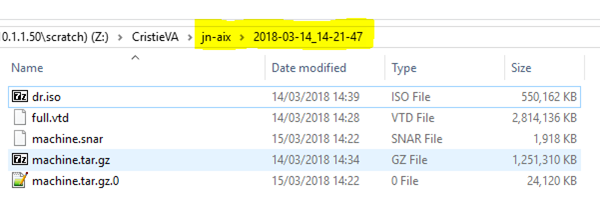
Attach to the target LPAR the required recovery ISO from the backup directory corresponding to the full, or incremental, backups for the desired hostname and date. For example:
Once attached to the LPAR, boot into the ISO. -
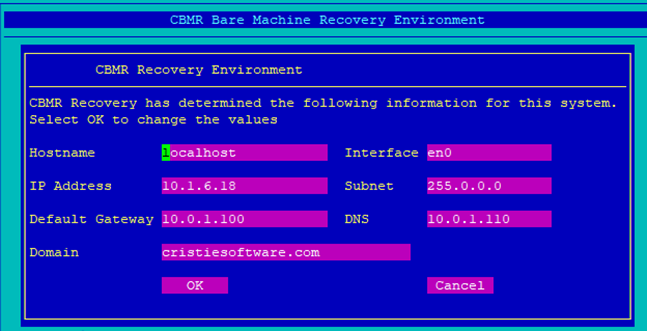
Once the recovery environment has loaded an attempt will be made to start networking and provide the Recovery Environment with a default DHCP IP address. Press any key to continue. This will then display the full network configuration setup page:
The network configuration will use a DHCP IP address by default, but this may be changed and a static IP applied if preferred. Press “OK” when ready to apply these settings.
Note: It is advised to change the Hostname to something meaningful if the recovery is to be monitored in the Cristie VA. -
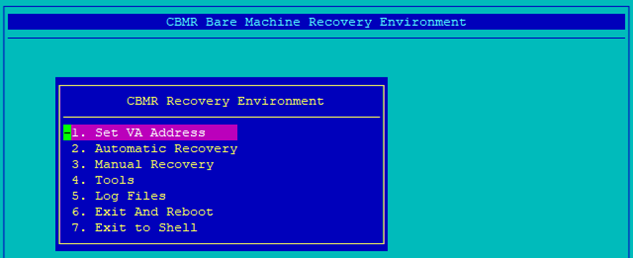
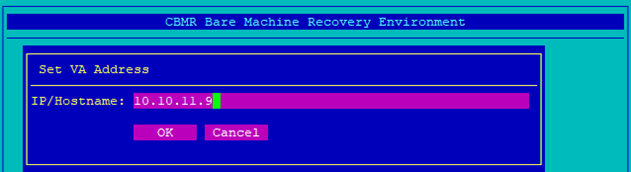
The Recovery Environment main menu will now be displayed. If you wish to monitor the recovery from the Cristie VA you can select Set VA Address and set the IP address or Hostname of the VA.
Automatic Recovery Configuration
-
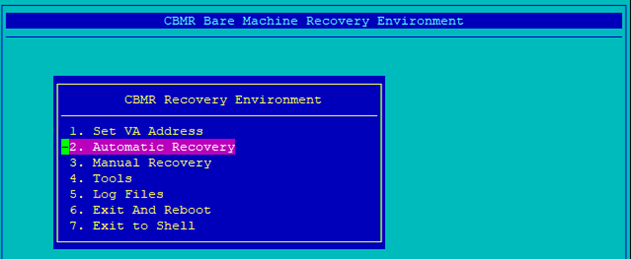
Once the network, and optionally the VA address, has been set you can now configure the recovery using the “Automatic Recovery” option from the main menu.
When selected a sub-menu will be shown. Here you can go back to the network setup, or continue to the recovery configuration by selecting “Continue…”. -
Next the Backup Location menu will be displayed:
First you must mount the NFS share which contains the backups for the desired machine – this will be the same path as you configured for the machine in the backup job. Select “Mount NFS Volume” to do this. You will be prompted for the hostname or IP address of the NFS server, the backup directory share path and the local mount point. It is recommended to use /mnt/backups as the mount point to be compatible with the default backup location. An example follows:
<img src=“/uploads/default/original/1X/190b963a90c94af5c189f4df19759e7cee4f579a.png” width=600" height=“234”>
Select “OK” to mount the share. If successful, a directory listing of the share will be displayed. Press any key to return to the Backup Location menu. -
Now select the “Create Backup Location” option. This will show the Backup Locations sub-menu:
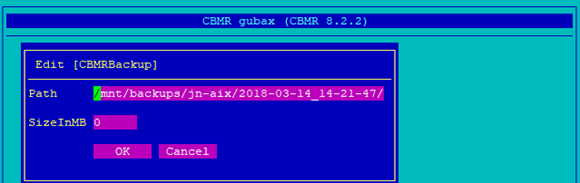
By default, a backup location is pre-defined with the mount location used during the backup. You can confirm that the correct backup location is being used by selecting “Edit Backup Location”, then select the pre-defined “CBMRBackup” location. This will show which time-stamped backup folder is currently selected. For Example:
This should correspond to the directory where the ISO was located. If for any reason this is not correct, edit the Path string to point to the correct folder (ignore the SizeInMB field). Select “OK” and then select “Exit” to return to the Backup Location menu.
-
If you wish to change which incremental backup to restore from select “Select Backup Version” to choose from a list using the up/down arrow keys, otherwise select “Continue…” to begin the backup configuration file restore stage.
-
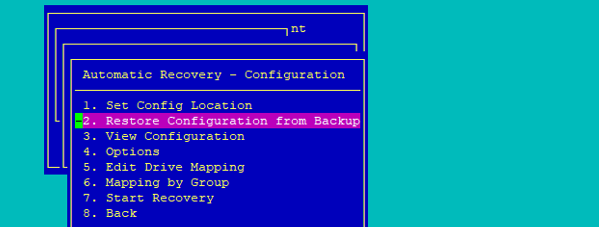
Prior to restoring the backup fileset, the original network and disk configuration must be retrieved from the configuration stored in the backup. Select “Restore Configuration from Backup” to do this.
If this step is successful you will see confirmation. Press ENTER to continue. -
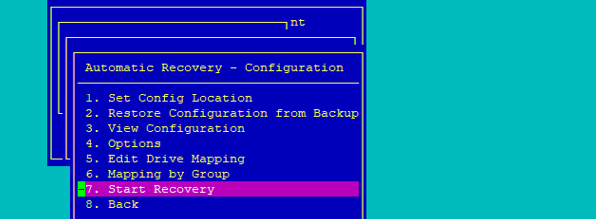
Now begin the main recovery step by selecting “Start Recovery”.
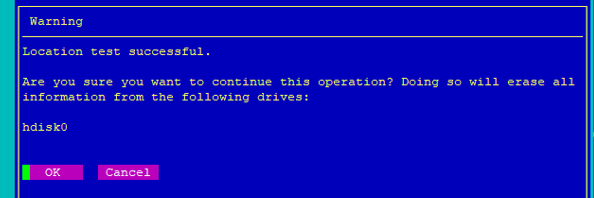
The backup location will first be tested to confirm the backup file is intact. Press ENTER to continue and then select “OK” to confirm the test.
-
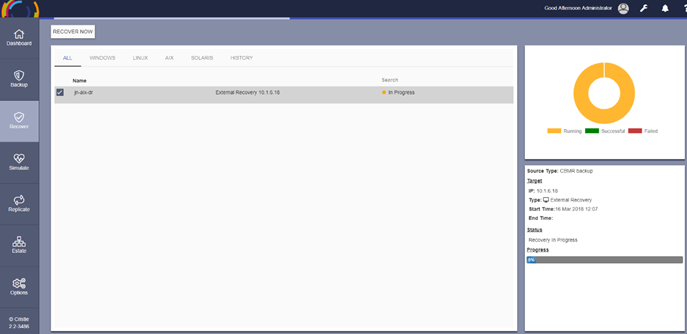
At this point the recovery will begin calculating the restore size and configure the disks. When this is complete the file restore progress step will begin and once finished you will be prompted to press ENTER to return back to the post-recovery menu. If you configured the VA address at the beginning of the recovery you can monitor its progress from the Cristie VA Restore page:


Post-Recovery and Saving the Logs
-
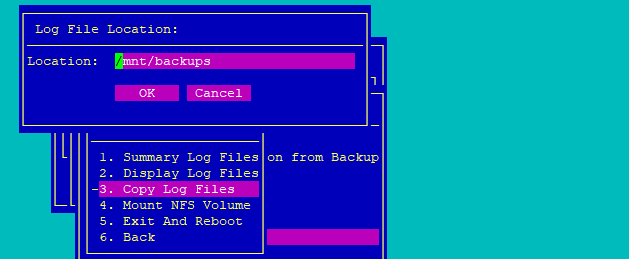
After recovery it is advisable to save the log files in case the recovered system does not boot, or if there was an error during recovery. To do this you can select “Copy Log Files” and save them to the already mounted backups directory /mnt/backups. Alternatively, you can mount a new NFS volume and save the logs to the new location.
-
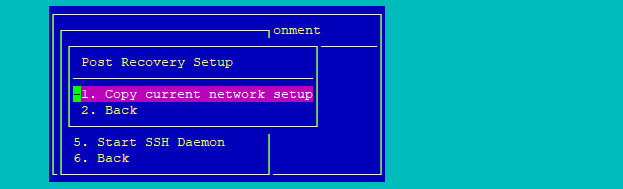
If you require the recovered system to have a new hostname and/or IP address, you must configure this before rebooting the machine. You can do this by returning to the Recovery Environment main menu and then select “Tools”. Select “Post Recovery Setup” and then “Copy current network setup”. This will copy the current Recovery Environment network settings to the recovered system.
If you require different settings you can go to “Tools” and then “Setup Network” to change the network settings, and then repeat the above steps to copy the changes to the recovered system.