Azure Cloud Configuration
To add a Microsoft Azure Hypervisor to the Cristie Virtual Appliance, you will first need to create an “App Registration” which allows the Cristie VA to authenticate with Azure and manage the resources in a subscription.
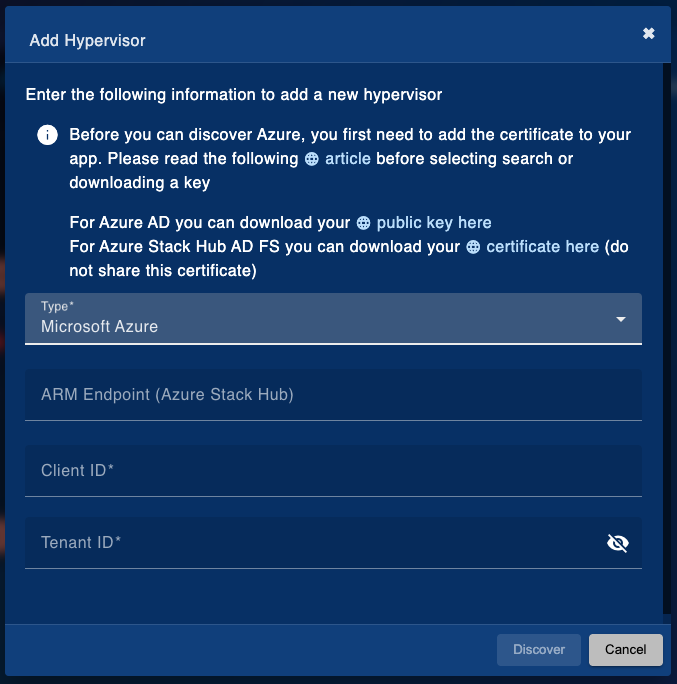
When the application has been created you will be able to retrieve the “Client ID”, “Tenant ID” and upload a public key.
To do this, log into the Azure Portal and go to “App Registrations”. Then click “New Registration”.
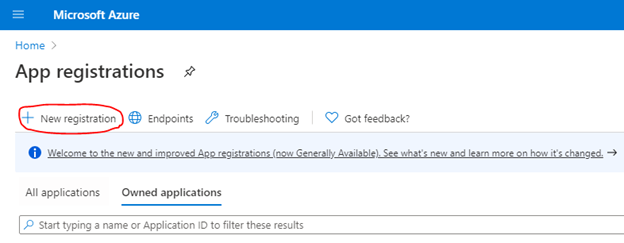
Fill in the required details but leave the “Redirect URI” empty, then create the registration.
You will be presented with the overview of the application; this is where you can copy the “Application (client) ID” and “Directory (tenant) ID”.

The last requirement before you can perform discovery is to upload the public key to the App Registration. To do this click “Certificates & Secrets” in the left-hand menu.
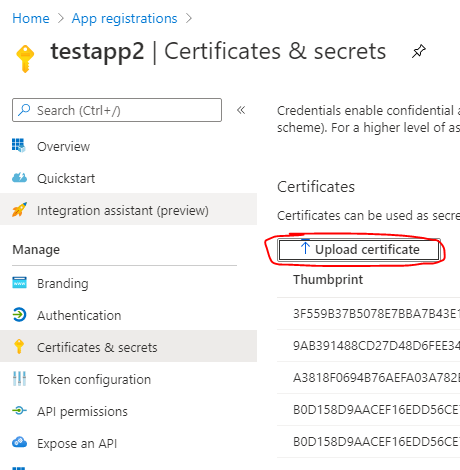
You can retrieve the public key to upload from the Cristie Appliance when you select the “Microsoft Azure” Hypervisor in “Add New Hypervisor” and download the “Azure AD” public key.
Lastly, the app will need to be assigned the contributor role within the Subscription that will be added to the Cristie VA.
Azure Stack Hub Configuration
If you are using Azure Active Directory (Azure AD), you can follow the same steps as the Azure Public Cloud Configuration. However, if you use Active Directory Federation Services (AD FS) you will need to register a new Service Principal using PowerShell.
You will also be required to import a certificate onto the host which is used for authentication between the Virtual Appliance and the Service Principal. You can obtain the certificate for Stack AD FS from the “Add New Hypervisor” page as shown above. The password to import the certificate is “Cr1st13”.
To configure the service principal you can follow the setup guide provided by Microsoft to create a service principal that uses a certificate: Register a Microsoft Entra app and create a service principal - Microsoft identity platform | Microsoft Learn
Important: You must import the Azure Stack Hub Self-Signed Certificate Authority before you can add the hypervisor. To obtain the certificate you can do the following:
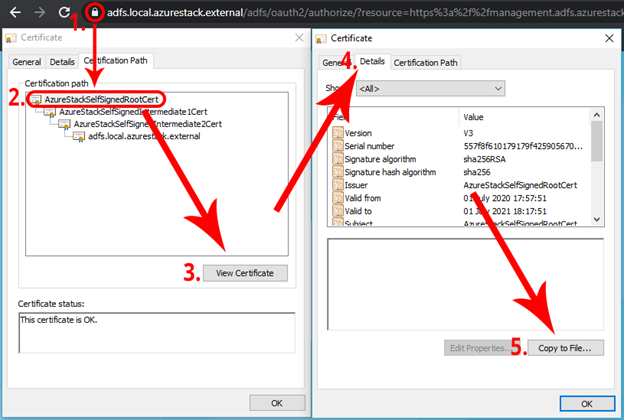
- Navigate to the Azure Stack portal and click on the padlock.
- Select the “Certification Path” tab and select the top-level certificate
- Select View Certificate
- Select the “Details” tab on the newly open window
- Select “Copy to File”.
You will then need to copy the certificate on to the VA. Once copied, run the following command to add the certificate to the key store:
keytool -import -trustcacerts -keystore /etc/pki/java/cacerts -storepass changeit -alias AzureStackRootCA -file </path/to/the/certificate.cer>